
How to Cav: Basic Guide
2023-12-21
Table of contents
Movement
The horse moves in two modes: walking and sprinting (activated by pressing the shift key). To maximize efficiency, sprint as much as possible. The horse will walk when you aim and shoot, but otherwise, always stay in sprint mode, especially when facing enemies.
Watch this video. As you can see, I stop only when I need to shoot. Reloads, grenade tosses, and other actions should be executed during a sprint.
The only time you can stop is when you want to hide to heal yourself or wait. This can only be done in dents, behind buildings, or hills. Otherwise, constant movement is your best friend.
On maps with airplanes, sprinting will help you stay alive because an AT plane can one-shot you anytime and anywhere. A good pilot could outplay a good horseman in most cases, but you shouldn't give up easily.
Hitbox
Damage varies depending on the ammunition and weapons, but ensure that you keep the horse's back (rear) facing enemies when performing most actions, such as shooting. The horse's head is the most vulnerable spot, so it needs to be hidden. Keep in mind that the rider has a bulletproof vest, so bullets can bounce off. Focus on ensuring your horse's safety.
What can kill you?
Here is a list of weapons and vehicles that can one-shot you:
- Tank shell
- AT rocket
- AT mine
- Tank hunter and his "little" baby
- Stationary howitzer
- AT plane
- Bombers
- 2 Light AT grenades (tossed by enemy cavalry)
- 2 tripwires
- Limpet (never happened to me)
The list of weapons and vehicles that can be dangerous:
- Attack plane
- Dynamite
- AT grenades
- Stationary and tank LMGs
The list of weapons that deal a lot of damage based on my personal experience:
- MP-18, SMG 08/18, Chauchat
- Parabellum, LMG 08/18, M1917 MG
- Sniper rifles, K bullets
3rd person view
People will think that you are cheating. But it's your legal cheats (thank you DICE).
Players will be angry because they don't understand how you can see them behind a hill or wall. You can look around 360 degrees (while some tanks and vehicles can't). Use this to your advantage. For example, some assaults like to lie down behind a hill and wait until you ride over it. Check using the 3rd person view before moving forward.
Map knowledge
Map zones
To properly hide your hitbox, you need to understand where on the map you can play and where you can't. Avoid cities and crowded spots for the following reasons:
- You can get stuck in the textures.
- You are riding close to the enemies, so they can't miss, and the damage will be maximum.
- You can die from a tripwire or AT mine. In the open field, you can see things like that.
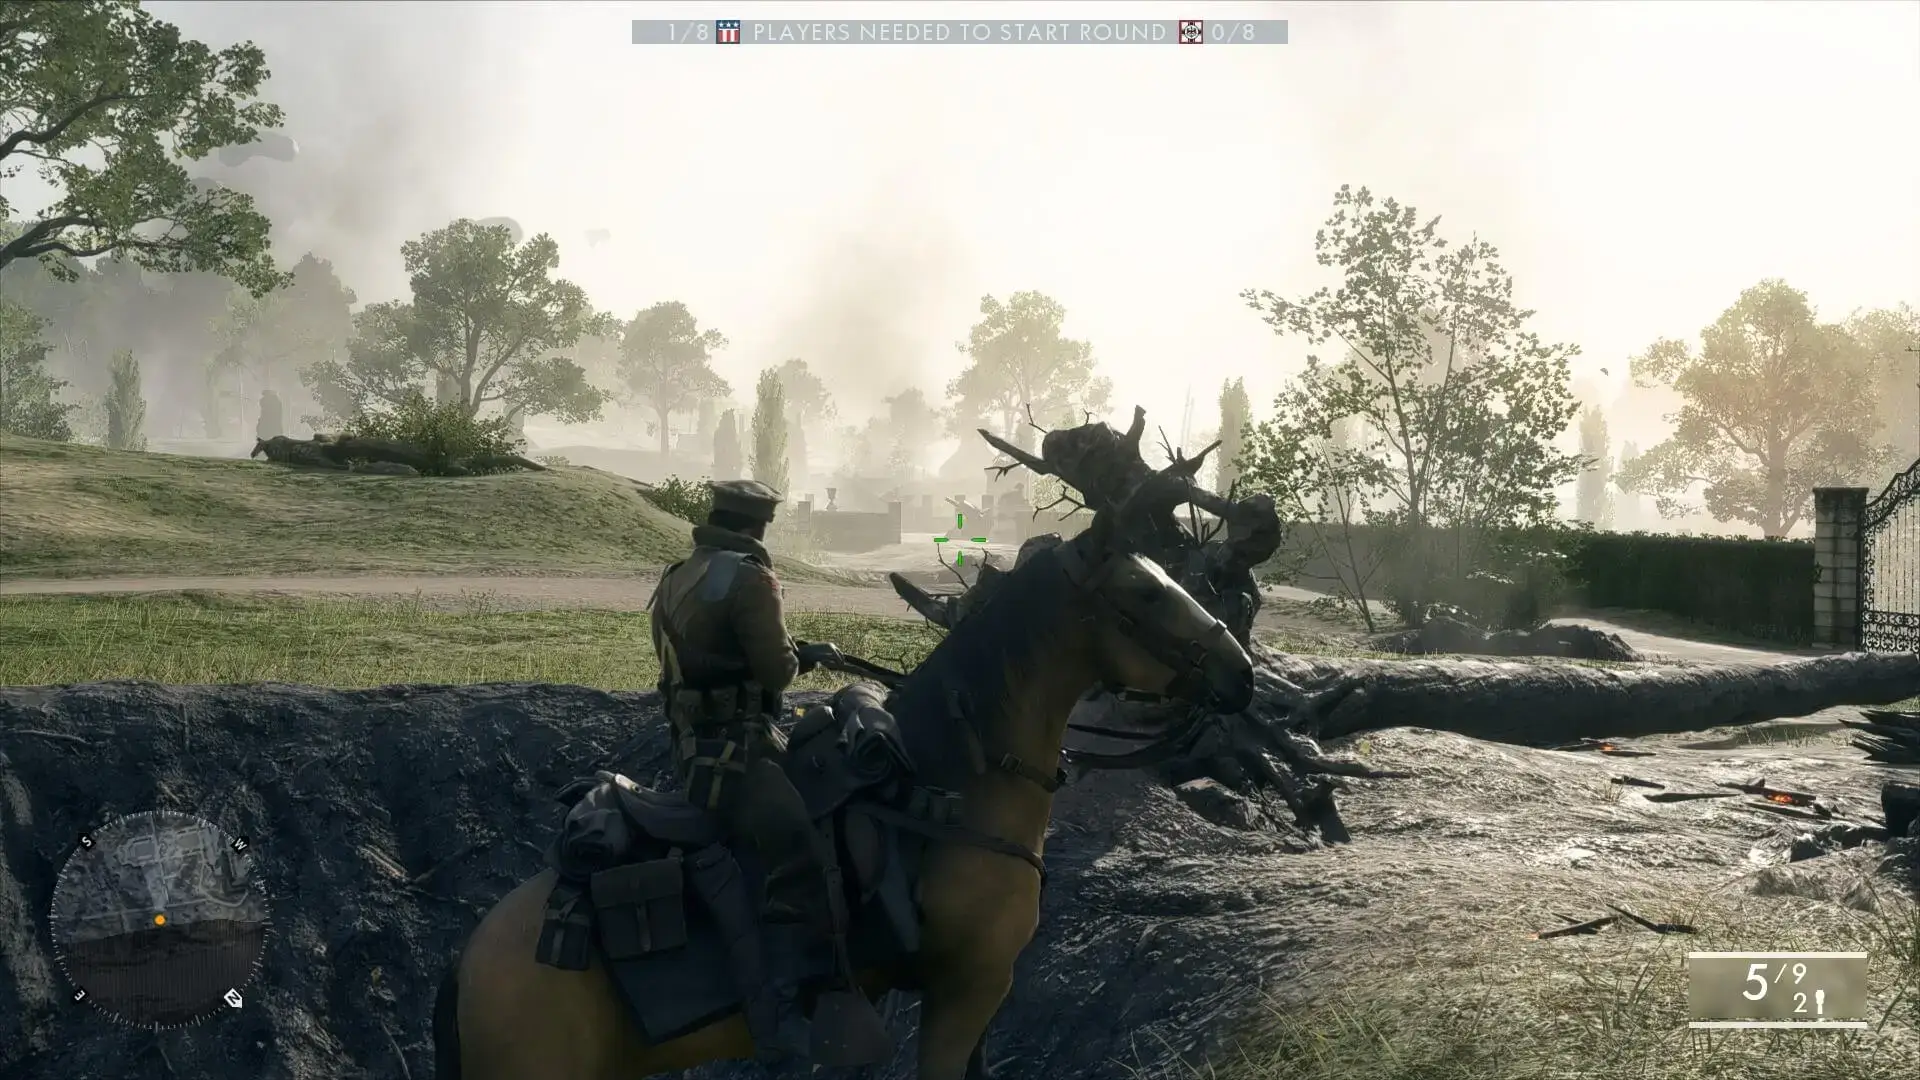
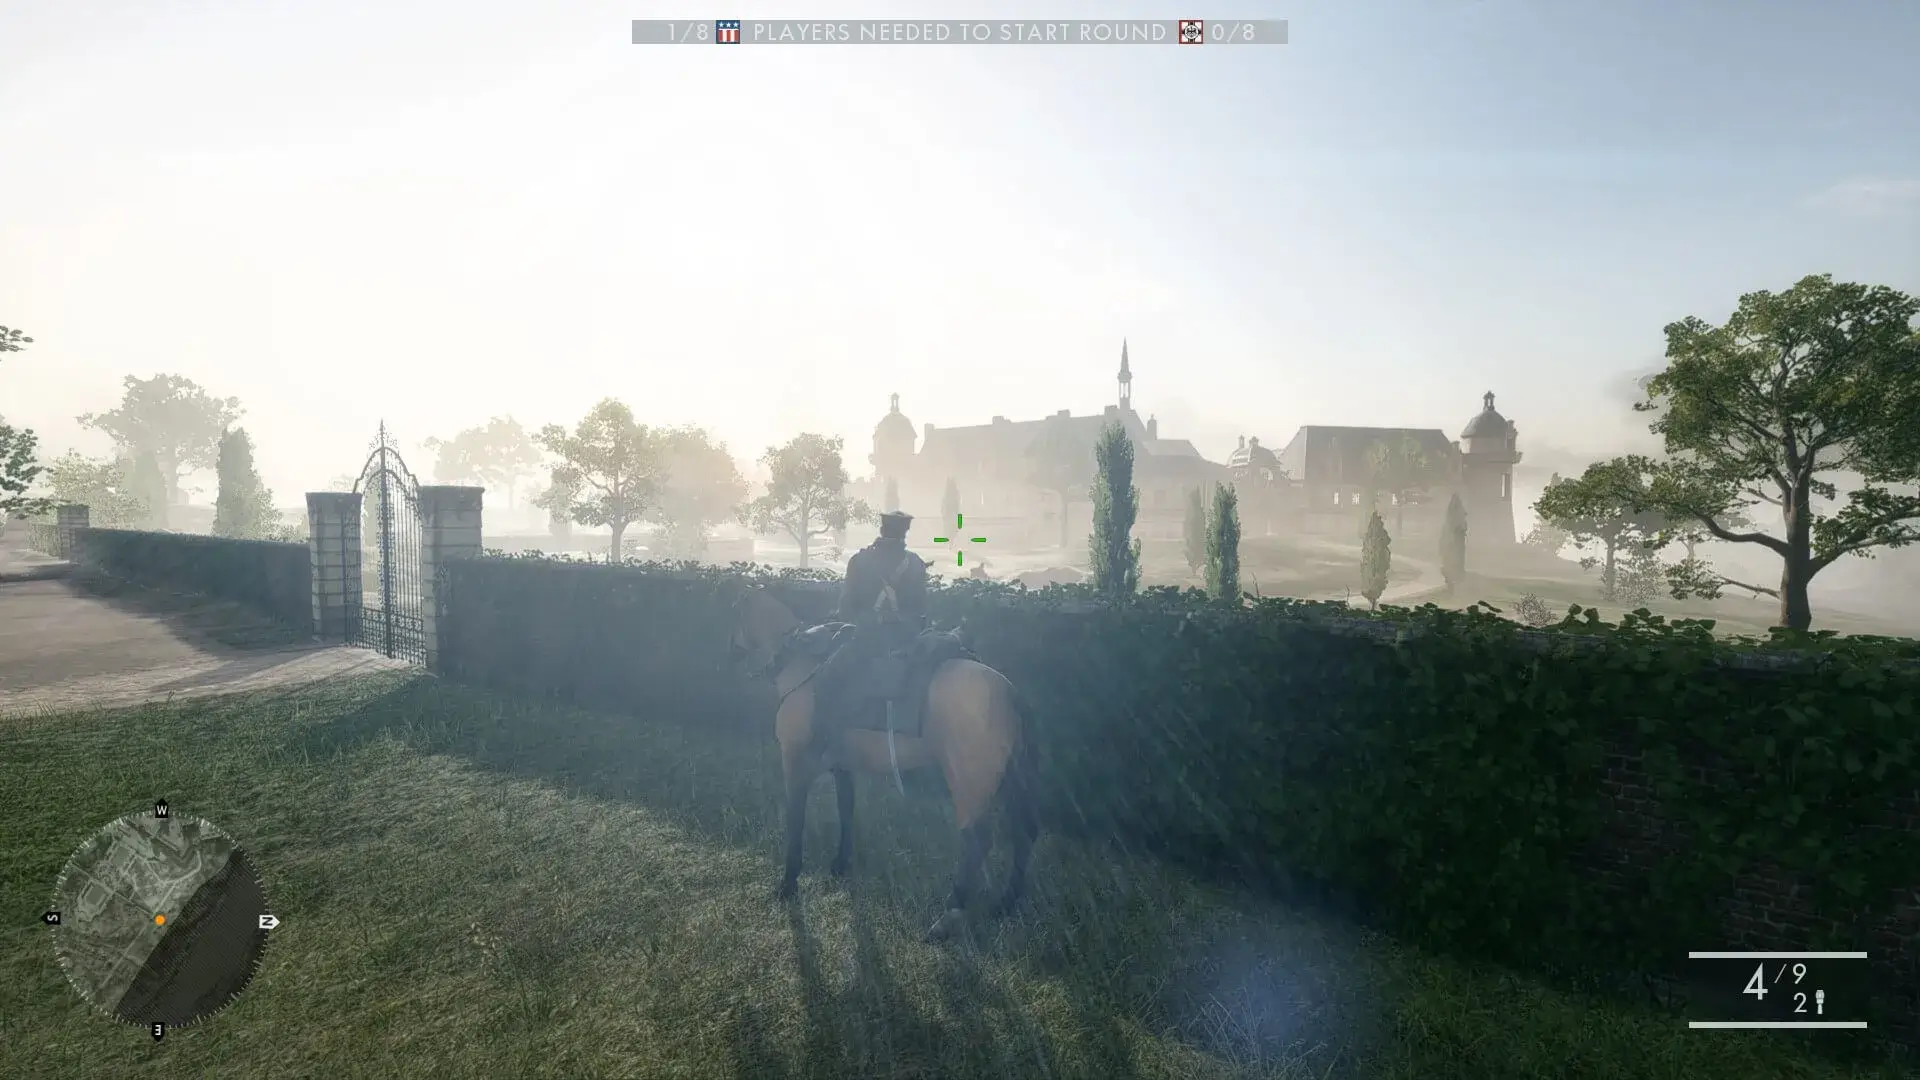
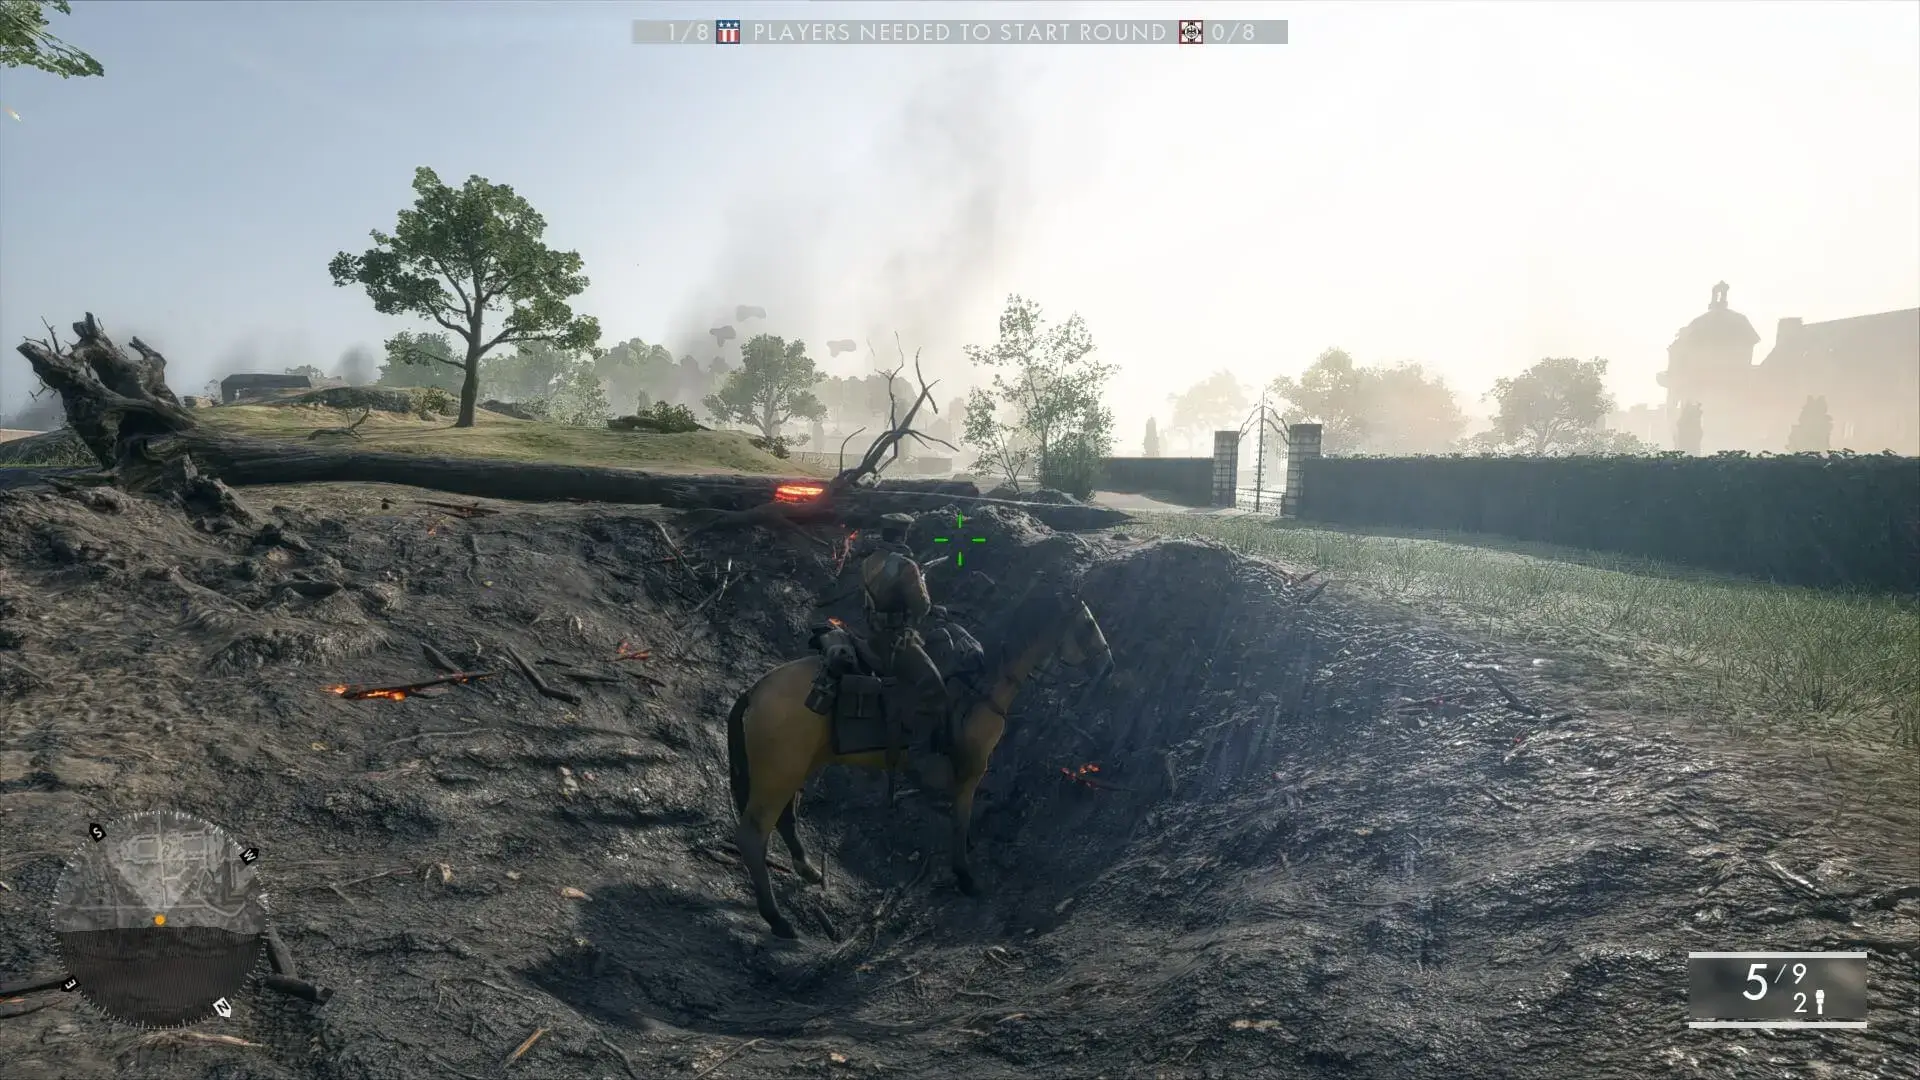
Relief
Terrain relief can help you hide your hitbox, so be creative about it. Look around and find places where your horse can be protected and where you can stop if needed. Look at these examples and notice how the horse's body is protected:
Combat area
One of the keys to survival and efficient horse gameplay lies outside the combat area. The horse is faster than infantry and most tanks. It's also more maneuverable than tanks and all vehicles. On most maps, you have the opportunity to exit the combat zone and use it as a temporary hideout. You will have enough time to resupply and reload your weapons.
This also helps to break visual contact, which is important when you are fighting 1vsN. In this video, you can see how I use the map border to access a good position, and in the end, I use it to break visual contact and kill the enemy cavalry.
The last thing is the ability to move past enemies and flank them. For example, on the Suez Operation, you can exit the combat area in all sectors on the right side. It will help to pass enemy lines.
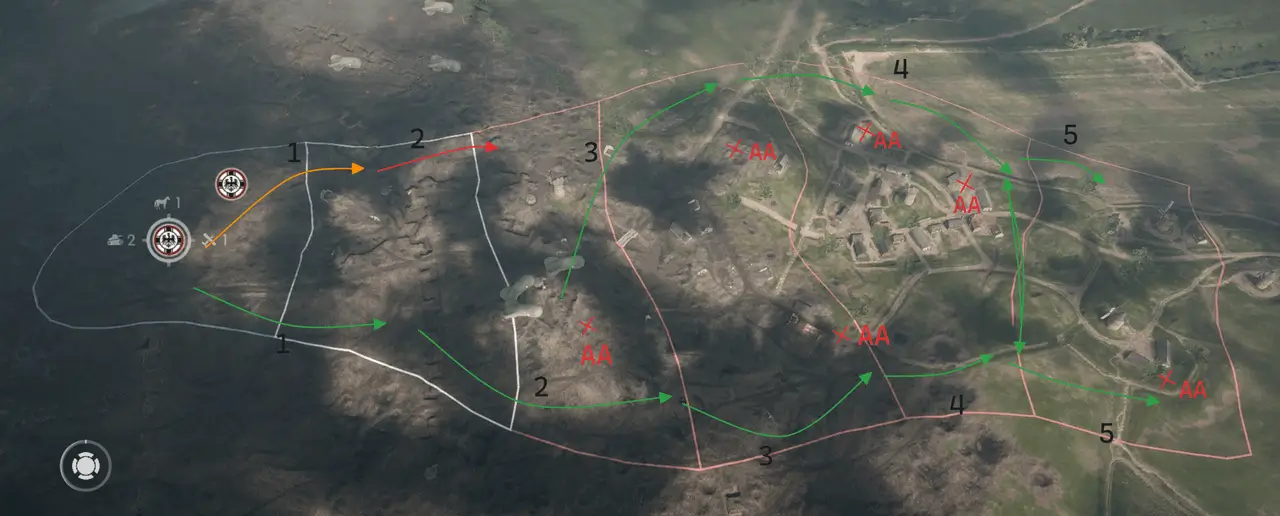
Common routes and spots
With experience comes knowledge about common spots where players will be. These could be places like roofs or windows on Suez, fences on St. Scar, balconies on Ballroom Blitz, or chimneys on Volga River.
Also, make sure you know where stationary weapons are located, such as LMGs, AAs, and howitzers. I try to play in a way that helps my team, so I always prioritize killing stationary weapons and AAs first. For example, on St. Scar in sectors 2, 3, 4 and 5, you can rush on the side in every sector and take out the AA. Friendly pilots will thank you.
Weapons
Rifle
The rifle can kill any regular infantry at any range with three bullets. At closer ranges (less than 40m), only two bullets are needed. So, the math is as follows1:
- 79dmg: 0-15 meters (can be 70-75 if limb is struck)
- 40-79dmg: 15-50 meters (max damage if head is struck)
- 40dmg: 50+ meters
When engaging more than two enemies at close range, the best-case scenario is having one extra bullet. Ensure to utilize grenades or retreat after 1-2 kills.
The rifle can one-shot enemies in the head, so prone targets can be killed using only one bullet. However, if you see an assault trying to go prone, it's a gamble: you can kill him, or he can kill you. If you're not sure, ride away.
Grenades
Grenades are a great utility against AT assault and bipod LMGs. Throw them before moving closer to either scare enemies away or cover your retreat. You need two grenades to kill a full HP infantry, so in most cases, it's advisable to toss them together. Do not rely solely on the rifle; throw grenades when they are ready.
Melee and roadkills
The horse can kill regular infantry by riding over them (roadkill). Use this tactic when you need to reload or don't have another choice. Prone enemies are easy targets for this.
Concerning melee, it's relatively simple: the lance is better than the sword (saber). It has a longer hitbox and active phase duration, making it superior in 99% of cases. Melee should be your last resort. Get comfortable with the basics and then move on to the lance.
Before you attack
- Always attack on full health. Synchronize your attack, resupply (ammo+medkit) and grenades reload time.
- Use 3rd person view to look around and determine the best direction of attack.
- Toss grenades if you see that enemies are waiting for you. They will have to move or die.
- Make sure you have a room for maneuvering and retreat.